

The Complete Makeup Guide for Beginners: Products, Techniques and Tips Learning how to apply makeup can feel overwhelming when you are just starting. With countless foundations, concealers, brushes, eyeshadow palettes, and lip products available, knowing what to buy and how to use each item is not always easy. The good news is that you do
The Complete Makeup Guide for Beginners: Products, Techniques and Tips
Learning how to apply makeup can feel overwhelming when you are just starting. With countless foundations, concealers, brushes, eyeshadow palettes, and lip products available, knowing what to buy and how to use each item is not always easy. The good news is that you do not need an expensive collection or professional skills to create a beautiful makeup look.
The secret to successful makeup is understanding a few essential products, choosing formulas that suit your skin, and practising simple application techniques. Whether you prefer a fresh, natural appearance or enjoy experimenting with different colours and styles, learning the basics will help you feel more confident.
This complete makeup guide for beginners explains everything from choosing your first makeup products to applying foundation, creating simple eye looks, selecting lip colours, and making your makeup last longer. Follow the steps at your own pace and discover a routine that works for you.
Suggested opening image: A professional flat-lay photograph featuring foundation, concealer, blush, mascara, lipstick, makeup brushes, and a soft pink cosmetic pouch arranged on a clean pastel-pink vanity.
“Makeup is not about changing who you are. It is about expressing your personality and enjoying the beauty of creativity.”
Table of Contents
- Introduction to Makeup for Beginners
- Understanding Different Types of Makeup Products
- Essential Makeup Products Every Beginner Needs
- How to Choose Makeup According to Your Skin Type
- Understanding Foundation, Concealer and Color Correctors
- Step-by-Step Makeup Application Order
- How to Apply Foundation Correctly
- Eye Makeup Techniques for Beginners
- Blush, Bronzer and Highlighter Explained
- Lip Makeup: Lipstick, Lip Gloss and Lip Liner
- How to Create a Natural Everyday Makeup Look
- Common Makeup Mistakes Beginners Should Avoid
- Makeup Tools and Brushes: A Complete Guide
- How to Make Makeup Last Longer
- Makeup Hygiene and Product Safety
- Frequently Asked Questions
- Final Thoughts
1. Introduction to Makeup for Beginners
Makeup is a collection of cosmetic products used to enhance, define, or change the appearance of different facial features. It includes complexion products, eye cosmetics, lip colours, and finishing products.
For beginners, the best approach is to start with a few versatile items instead of purchasing every product available. You can create attractive everyday looks with foundation or skin tint, concealer, mascara, blush, and lipstick.
It is equally important to understand that makeup is personal. Some people enjoy full-coverage foundation and dramatic eye looks, while others prefer lightweight products and barely noticeable colour.
There is no single correct way to wear makeup. The goal is to learn techniques that complement your preferences and make you feel comfortable.
2. Understanding Different Types of Makeup Products
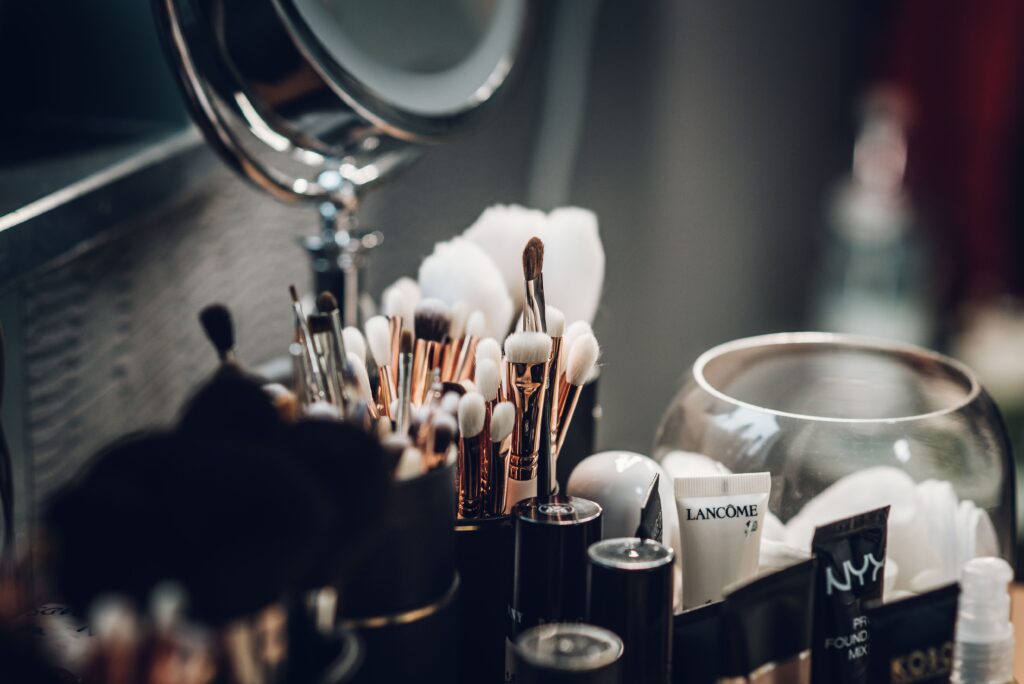 Before building a makeup collection, understand the main product categories and what each one does.
Face Makeup
Face products help create an even-looking complexion and add colour or dimension.
- Primer: Creates a base for makeup and can help improve how certain products sit on the skin.
- Foundation: Adds coverage and helps even out the appearance of skin tone.
- Concealer: Provides additional coverage for areas such as under the eyes or individual blemishes.
- Setting powder: Helps reduce shine and set cream or liquid products.
- Blush: Adds colour to the cheeks.
- Bronzer: Adds warmth and a sun-kissed appearance.
- Highlighter: Adds a reflective finish to selected facial areas.
Eye Makeup
Eye cosmetics enhance the appearance of the eyes and eyebrows.
- Eyeshadow adds colour and dimension to the eyelids.
- Eyeliner defines the lash line.
- Mascara adds colour and definition to eyelashes.
- Eyebrow pencils, powders, and gels help fill or shape brows.
Lip Makeup
Lip products add colour, shine, or definition.
- Lipstick provides colour in different finishes.
- Lip gloss adds shine.
- Lip liner outlines and defines the lips.
- Lip tint provides a lighter wash of colour.
Understanding these categories makes it easier to decide which products are genuinely useful for your routine.
3. Essential Makeup Products Every Beginner Needs
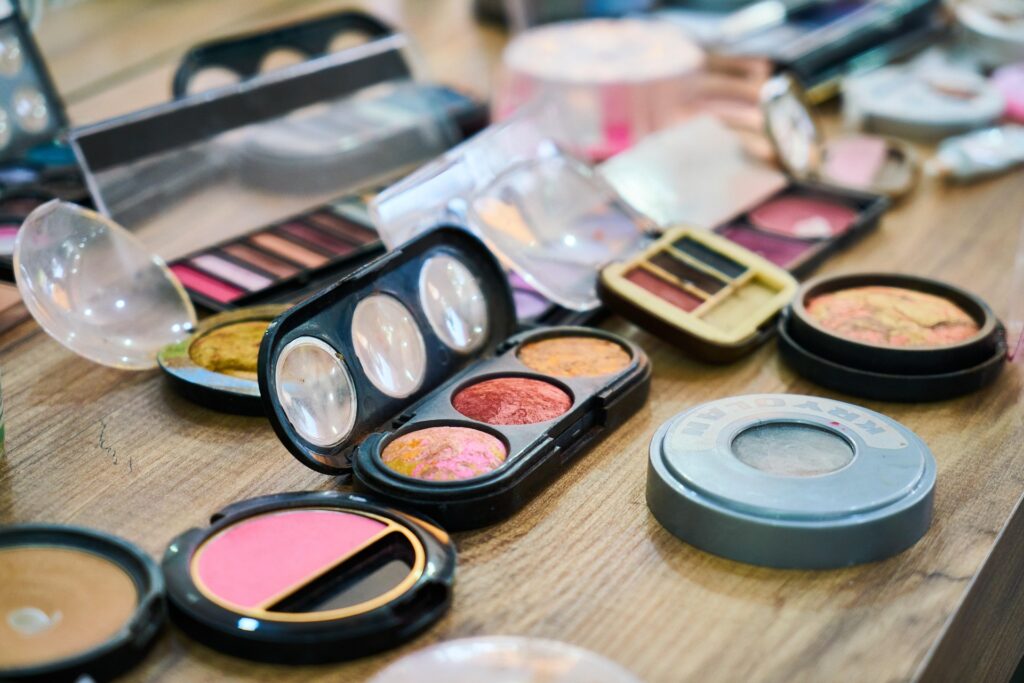 You do not need a large makeup collection to get started. A small selection of practical products is enough to create several everyday looks.
Consider these essentials:
| Product | Main purpose |
|---|---|
| Foundation or skin tint | Evens the appearance of skin tone |
| Concealer | Adds coverage to selected areas |
| Setting powder | Helps set makeup and reduce shine |
| Blush | Adds colour to cheeks |
| Mascara | Defines eyelashes |
| Eyebrow pencil or gel | Shapes and defines eyebrows |
| Lipstick or lip gloss | Adds colour or shine |
| Makeup sponge or brush | Helps blend products |
A beginner can also consider purchasing a neutral eyeshadow palette containing shades such as beige, brown, taupe, and soft champagne.
PINK TIP — START SMALL
Choose products that serve more than one purpose when possible. For example, a cream blush may also work as a lip colour if the manufacturer confirms that it is suitable for both areas. Always follow the product’s intended-use instructions.
As your skills develop, you can gradually introduce additional products such as eyeliner, contour, setting spray, and different eyeshadow finishes.
4.How to Choose Makeup According to Your Skin Type
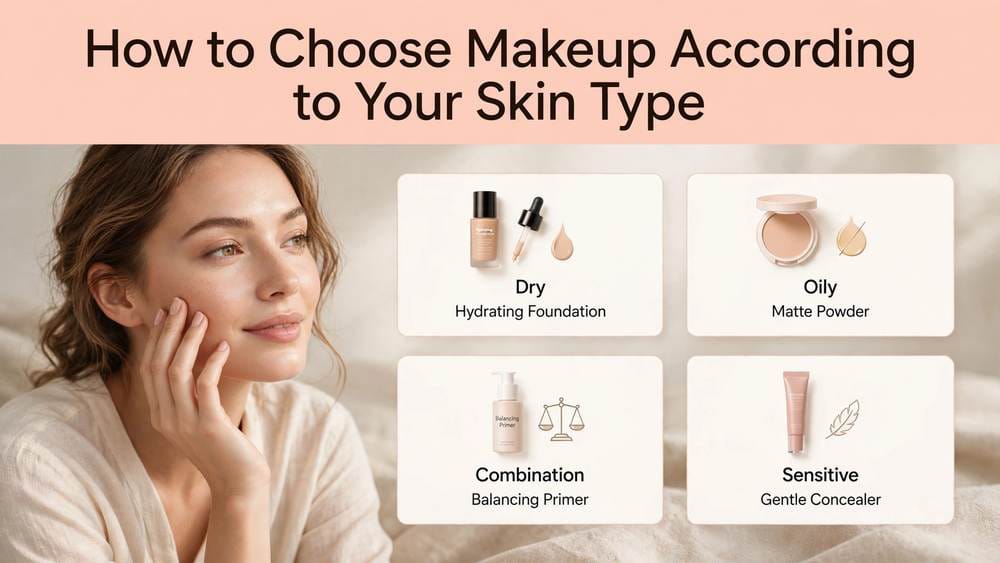 The right makeup formula can make application easier and help create a more comfortable finish.
Normal Skin
Normal skin generally has a balanced feel without excessive oiliness or dryness. Most foundation finishes can work, so choose according to your preferred appearance.
Dry Skin
Dry skin may feel tight or appear flaky. Lightweight liquid or cream foundations with a comfortable, moisturising feel may be preferable.
Prepare the skin with a suitable moisturiser before applying makeup. Avoid applying too much powder over visibly dry areas.
Oily Skin
Oily skin often develops shine, particularly around the forehead, nose, and chin.
Consider lightweight, oil-free or non-comedogenic products. A small amount of setting powder can help control shine where needed.
Combination Skin
Combination skin has both oily and dry areas. You may need different application techniques across your face.
For example, apply a little powder around the T-zone while keeping the cheeks lightly powdered or powder-free.
Sensitive Skin
If your skin reacts easily, choose products carefully and review their ingredient lists. Introduce new products one at a time and discontinue anything that causes irritation.
PINK TIP: Skin type is only one consideration. Your preferred coverage, climate, comfort, and the finish you enjoy also matter when selecting makeup.
5. Understanding Foundation, Concealer and Color Correctors
These three complexion products are often confused, but they perform different jobs.
Foundation
Foundation is applied across the face to create a more even-looking complexion. It comes in several formulas:
- Liquid foundation: Available in a wide range of coverage levels and finishes.
- Cream foundation: Usually has a thicker consistency and may offer more coverage.
- Powder foundation: Provides a powder-based finish and can be convenient for touch-ups.
- Stick foundation: A solid formula that can be applied directly or with a brush.
- Skin tint: Generally offers lighter coverage for a more natural appearance.
Concealer
Concealer is used selectively to provide additional coverage. Common application areas include under the eyes, around the nose, and over individual blemishes.
A concealer close to your foundation shade works well for covering imperfections. A slightly lighter shade may brighten the under-eye area, although a large contrast can look unnatural.
Color Correctors
Color correctors use colour theory to help visually balance certain discolouration before concealer or foundation.
- Peach or orange: Can help neutralise the appearance of bluish or purple under-eye darkness, depending on skin tone.
- Green: Can visually balance redness.
- Yellow: Can help soften the appearance of purple or bluish discolouration.
- Lavender: Can help balance a yellowish appearance.
Apply a very thin layer only where needed. Color correctors are optional, not essential for every beginner.
6. Step-by-Step Makeup Application Order
Following a consistent order makes makeup application easier and reduces unnecessary layering.
Here is a practical sequence for a beginner:
- Cleanse your face: Start with clean skin.
- Apply moisturiser: Choose a formula appropriate for your skin type.
- Apply sunscreen during daytime: Use a suitable broad-spectrum sunscreen as directed. Allow skincare to settle before makeup.
- Apply primer: Optional. Use it if you want help with a particular finish or makeup concern.
- Apply foundation or skin tint: Blend a thin, even layer across the face.
- Apply concealer: Add coverage where needed.
- Use color corrector: If required, apply it to specific discoloured areas, generally before foundation or concealer.
- Apply setting powder: Lightly set areas that crease or become oily.
- Apply eyebrow products: Fill sparse areas and shape the brows.
- Apply eyeshadow: Start with a light transition shade and add depth gradually.
- Apply eyeliner: Optional, depending on your desired look.
- Apply mascara: Coat the upper lashes carefully.
- Apply bronzer: Add warmth to areas where the sun would naturally hit.
- Apply blush: Add colour to the cheeks.
- Apply highlighter: Use a small amount on selected high points.
- Apply lip products: Finish with lip liner, lipstick, gloss, or lip balm.
- Apply setting spray: Optional. Use it according to the product instructions.
The exact order can vary. For example, many people apply powder blush after powder products, while cream blush is often applied before setting powder. Applying eyeshadow before foundation can also make it easier to clean up fallen powder.
PINK TIP — THERE IS NO NEED TO USE EVERY STEP
For a simple routine, you can skip primer, color corrector, bronzer, highlighter, eyeliner, and setting spray. Choose the products that contribute to the finish you actually want.
7. How to Apply Foundation Correctly
Foundation is one of the most important complexion products to understand because the wrong shade or application technique can make the finished look appear unnatural.
Choose the Right Shade
Test foundation shades along the jawline rather than relying only on the colour of your hand. Compare a few close shades in natural lighting and allow the formula to settle before deciding.
The best match should blend naturally between your face and neck.
Understand Your Undertone
Undertone refers to the subtle colour beneath the surface of your skin.
- Warm undertones: Often have golden, yellow, or peach characteristics.
- Cool undertones: Often have pink, red, or bluish characteristics.
- Neutral undertones: Usually have a balance of warm and cool characteristics.
Vein colour can offer a rough clue, but it is not a reliable standalone test. Checking how different foundation shades look against your jawline is more useful.
Choose the Right Formula
Select a formula according to your skin and desired coverage.
- Light coverage: Suitable when you want your natural skin to remain visible.
- Medium coverage: Helps create a more even appearance while retaining some natural texture.
- Full coverage: Provides more substantial coverage when desired.
Apply and Blend
Follow these simple steps:
- Begin with a small amount of foundation.
- Place it on the centre of your face or areas where you want coverage.
- Blend outward towards the hairline and jaw.
- Use a damp makeup sponge or suitable foundation brush.
- Build additional coverage gradually rather than applying a thick layer immediately.
- Check the jawline and hairline for visible edges.
Avoid rubbing aggressively. Gentle tapping or controlled brush movements usually produce a more even result.
Remember: Natural skin has texture. A successful foundation application does not need to hide every pore, line, or mark.
8. Eye Makeup Techniques for Beginners 
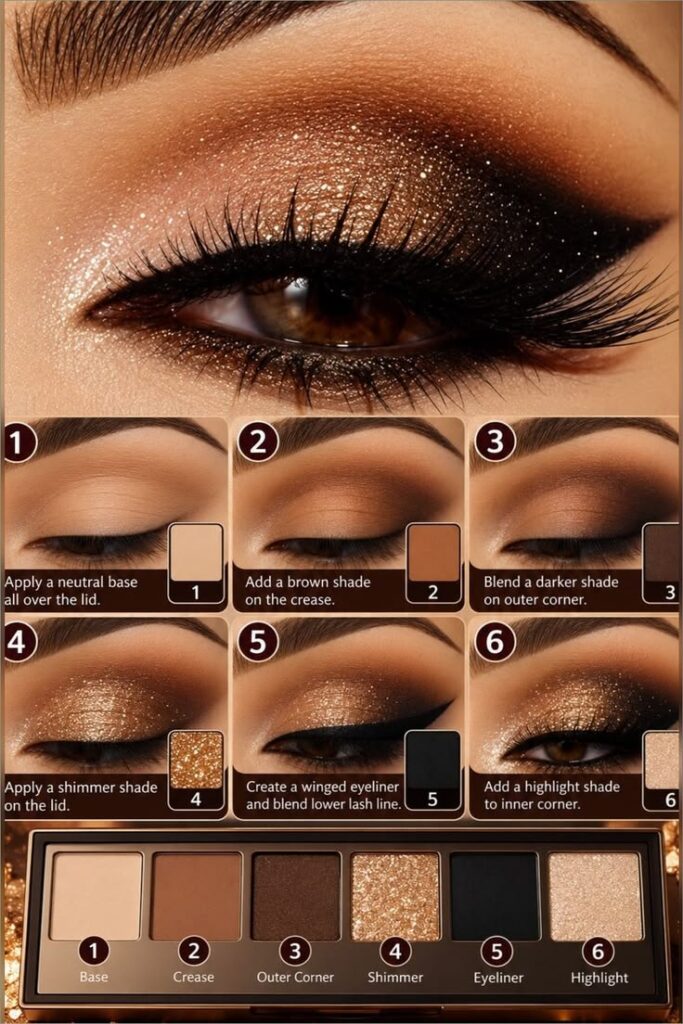
Eyeshadow Basics
A neutral eyeshadow palette is a useful starting point.
Try this three-shade technique:
- Apply a light beige shade across the eyelid.
- Blend a medium brown shade into the crease, the natural fold above the eyelid.
- Add a small amount of a deeper brown shade to the outer corner for dimension.
Use a clean blending brush to soften harsh edges. Blending means gently diffusing the boundaries between shades so they transition smoothly.
Eyeliner
Eyeliner defines the upper or lower lash line.
Common types include:
- Pencil eyeliner: Easy to control and useful for softer definition.
- Liquid eyeliner: Suitable for sharper, more precise lines.
- Gel eyeliner: Offers a creamy consistency and is often applied with a brush.
Beginners can start by drawing small strokes close to the upper lash line rather than attempting one long line.
Mascara
Mascara helps define the eyelashes.
Look downward into a mirror, position the wand near the lash roots, and gently move it towards the tips. Apply a light second coat if desired, following the product directions.
Avoid pumping the wand repeatedly into the tube, as this can introduce air and contribute to drying.
Eyebrow Products
Eyebrows help frame the face. Beginners can use:
- Brow pencils to fill sparse areas.
- Brow powders to create softer definition.
- Clear or tinted brow gels to keep hairs in place.
Use small, light strokes that resemble natural brow hairs instead of drawing one solid block of colour.
PINK TIP: Start with neutral eyeshadow, a soft pencil eyeliner, and mascara. You can create an attractive everyday eye look without complicated techniques.
9. Blush, Bronzer and Highlighter Explained
These products are all used to add dimension or colour, but their purposes are different.
Blush
Blush adds colour to the cheeks and can create a fresh appearance.
Popular formulas include powder, cream, and liquid blush.
Smile gently to locate the apples of your cheeks, then apply a small amount and blend upward and outward. Placement can be adjusted according to your facial structure and preferred look.
Bronzer
Bronzer adds warmth and can create a sun-kissed effect.
Apply a light amount around the forehead, temples, and upper cheek area. Blend carefully to prevent visible lines or overly dark patches.
Bronzer is not necessarily the same as contour. Bronzer generally adds warmth, whereas contour products are used to create the appearance of shadows and definition.
Highlighter
Highlighter adds a reflective finish to selected areas.
Common placement areas include:
- Upper cheekbones.
- The bridge of the nose, if desired.
- The inner corners of the eyes.
- The cupid’s bow.
Use a light hand, especially if the product has noticeable shimmer.
10. Lip Makeup: Lipstick, Lip Gloss and Lip Liner
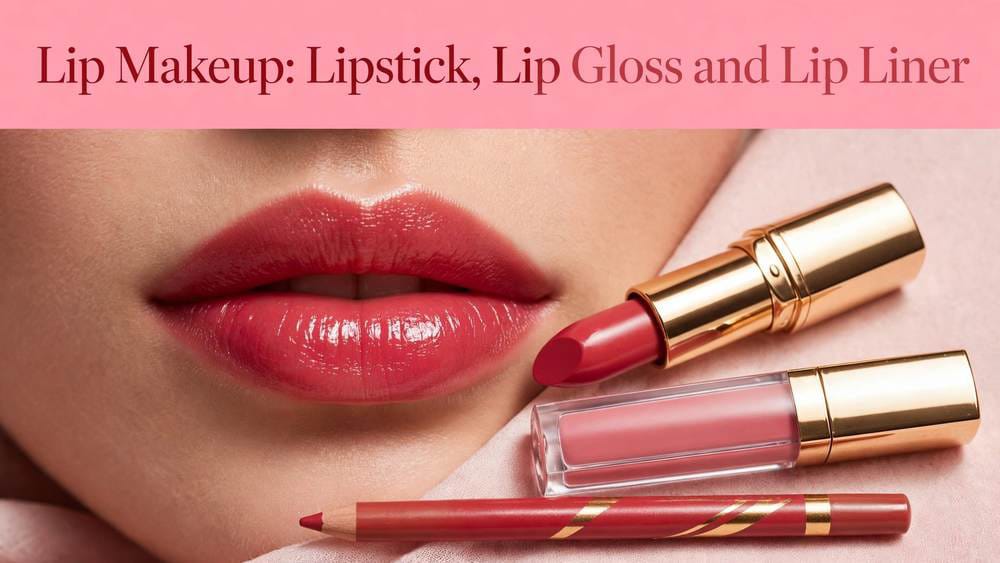 Lip makeup is an easy way to introduce colour into your routine.
Lipstick
Lipstick provides colour and is available in several finishes:
- Matte: A non-shiny finish.
- Satin: A smooth finish with a subtle sheen.
- Cream: A comfortable-looking finish with some moisture.
- Sheer: A lighter wash of colour.
Choose a shade according to your preference, outfit, and the overall look you want.
Lip Gloss
Lip gloss adds shine and can make lips look more reflective. Some formulas are transparent, while others contain colour or shimmer.
It can be worn alone or layered over lipstick.
Lip Liner
Lip liner defines the lip outline and can help create a more polished lipstick application.
For a natural look, select a liner close to your lipstick or natural lip colour.
Simple Lip Application Technique
- Begin with clean, comfortable lips.
- Apply lip balm if needed.
- Outline your natural lip shape with a lip liner.
- Lightly fill the lips if you want additional definition.
- Apply lipstick from the centre towards the edges.
- Add gloss if you prefer a shiny finish.
You do not need to follow every lip trend. Nude, pink, peach, berry, and classic red shades all offer different styling possibilities.
11. How to Create a Natural Everyday Makeup Look
A natural makeup look is an excellent starting point because it uses a small number of products and does not require advanced skills.
Follow this simple routine:
Step 1: Prepare Your Skin
Cleanse, moisturise, and apply daytime sunscreen. Give skincare time to settle.
Step 2: Apply a Lightweight Base
Use a skin tint or lightweight foundation. Blend gently and concentrate on areas where you want more even coverage.
Step 3: Add Concealer
Apply a little concealer beneath the eyes or over selected imperfections. Blend the edges carefully.
Step 4: Set Where Necessary
Use a small amount of setting powder around the nose, forehead, or other areas that tend to become shiny.
Step 5: Define Your Brows
Brush your brows into shape and fill any sparse areas using light strokes.
Step 6: Add Mascara
Apply one coat of mascara for subtle lash definition.
Step 7: Apply Blush
Choose a soft peach, rose, or pink shade and blend a small amount onto the cheeks.
Step 8: Finish Your Lips
Use tinted lip balm, nude lipstick, or a soft pink gloss.
Step 9: Check the Finished Look
Look at your makeup in natural lighting. Blend any visible edges and remove excess product if necessary.
The result should feel comfortable and balanced rather than heavily layered.
12. Common Makeup Mistakes Beginners Should Avoid
Learning makeup also means understanding what can go wrong and how to correct it.
| Common mistake | How to avoid it |
|---|---|
| Choosing the wrong foundation shade | Test shades along your jawline |
| Applying too much foundation | Start with a thin layer |
| Skipping moisturiser | Prepare your skin before makeup |
| Using too much powder | Apply only where necessary |
| Poor blending | Use gentle, controlled movements |
| Applying too much blush | Build colour gradually |
| Drawing heavy eyebrows | Use light, hair-like strokes |
| Using dirty brushes | Clean tools regularly |
| Sleeping with makeup on | Remove makeup before bed |
| Ignoring product instructions | Read labels and follow directions |
Another common mistake is purchasing products simply because they are popular online. A product that works well for one person may not suit another person’s skin type, undertone, or preferences.
Focus on learning how to use your existing products before expanding your collection.
13. Makeup Tools and Brushes: A Complete Guide
The right tools can make makeup application easier and more controlled.
Foundation Brush
A foundation brush helps spread and blend liquid or cream foundation. Flat, rounded, and dense buffing brushes are common options.
Powder Brush
A large, fluffy brush distributes loose or pressed powder over the face.
Blush Brush
A medium-sized, soft brush helps apply blush to the cheeks without depositing too much colour in one place.
Eyeshadow Brushes
Different shapes serve different purposes:
- Flat shader brush: Places eyeshadow on the eyelid.
- Blending brush: Softens edges and blends shades.
- Small detail brush: Applies colour to smaller areas.
Angled Brush
An angled brush can help apply brow powder or suitable gel products and create more precise lines.
Makeup Sponge
A makeup sponge is useful for blending foundation and concealer. A slightly damp sponge can help create a soft, blended finish with many liquid and cream formulas.
Avoid using a sponge when it is dirty or damaged.
How to Clean Makeup Brushes
Clean brushes regularly to remove accumulated product, oil, and dirt.
The American Academy of Dermatology recommends washing makeup brushes every 7 to 10 days. It also provides practical cleaning instructions:
- Rinse the brush tips with lukewarm water.
- Use a gentle cleanser or shampoo.
- Swirl the bristles gently to remove product.
- Rinse until the water runs clear.
- Remove excess moisture with a clean towel.
- Lay the brushes flat to dry.
Clean makeup sponges after every use and allow them to dry properly.
Reference: American Academy of Dermatology – How to Clean Makeup Brushes.
14. How to Make Makeup Last Longer
Makeup longevity depends on skin preparation, product formulas, application methods, and environmental conditions.
Here are practical ways to help your makeup stay looking fresh.
Prepare Your Skin
Cleanse and moisturise before application. Makeup tends to sit less evenly on skin that feels excessively dry or has visible product buildup.
Choose Compatible Products
Consider your skin type and the formulas you are layering. Some combinations may separate or feel heavy.
If your makeup repeatedly pills or separates, try using fewer layers and allowing each skincare product to settle before applying the next.
Apply Thin Layers
Several thin layers generally provide more control than one thick application. This also makes it easier to correct mistakes.
Use Setting Powder
Apply powder lightly to areas that crease or become oily. Avoid excessive powder, which can make makeup look dry or heavy.
Consider Setting Spray
Setting sprays are designed to finish a makeup look and may help certain formulas wear more evenly. Follow the manufacturer’s directions.
Carry Essential Touch-Up Products
For longer days, consider keeping blotting papers, a compact powder, or your lipstick in your bag.
You do not need to repeatedly reapply your entire makeup routine.
15. Makeup Hygiene and Product Safety
Beautiful makeup should never come at the expense of personal hygiene. Products and applicators need proper care to reduce contamination and irritation risks.
Clean Your Brushes and Sponges
Wash brushes regularly and clean sponges after each use. Never leave damp tools stored in closed containers where they cannot dry properly.
Avoid Sharing Makeup
Do not share mascara, eyeliner, lipstick, or other products that come into direct contact with skin or mucous membranes.
Sharing makeup can transfer germs and increase the risk of infection.
Check Product Shelf Life
Look for the period-after-opening symbol on the packaging. It usually appears as an open jar with a number and the letter M, indicating the recommended number of months after opening.
Mascara deserves particular attention. The US Food and Drug Administration notes that manufacturers commonly recommend discarding mascara two to four months after purchase.
Always follow the manufacturer’s instructions and replace products sooner if they change in smell, colour, or texture.
Store Products Properly
Keep makeup containers tightly closed and store them in a clean, dry place away from direct sunlight and excessive heat.
Avoid leaving cosmetics inside hot vehicles.
Maintain Eye Makeup Hygiene
Never add water or saliva to dried mascara. Do not use eye makeup while experiencing an eye infection, and discard potentially contaminated eye products as appropriate.
Avoid applying makeup while travelling in a moving vehicle.
If a cosmetic causes irritation, stop using it. Seek medical advice if the reaction persists or is severe.
For further guidance, consult:
- FDA – Eye Cosmetic Safety
- FDA – Shelf Life and Expiration Dating of Cosmetics
- FDA – Using Cosmetics Safely
16. Frequently Asked Questions
1. What makeup products should a beginner buy first?
Start with a small collection containing foundation or skin tint, concealer, blush, mascara, eyebrow product, lipstick or lip gloss, and a basic makeup sponge or brush. Add other products as you become more confident.
2. Can I wear makeup without using foundation?
Yes. Foundation is optional. You can use concealer only on selected areas, apply a skin tint, or simply wear mascara, blush, and lip colour.
3. How long does it take to learn makeup?
It depends on how often you practise and which techniques you want to learn. Simple everyday makeup can become easier with regular practice, while detailed eye looks and advanced techniques may require more time.
4. Should beginners use liquid or powder foundation?
Both are options. Liquid foundation offers flexibility in coverage and finish, while powder foundation can be convenient for people who prefer a powder-based formula. Choose according to your skin type and comfort.
5. Is primer necessary before applying foundation?
No. Primer is optional. Some people enjoy using it to address concerns such as visible pores, excess shine, or makeup wear, but moisturiser and suitable foundation may be sufficient for a simple routine.
6. How can I find my correct foundation shade?
Test several close shades along your jawline in natural lighting. Consider your undertone and check how the colour blends between your face and neck.
7. What is the easiest makeup look for beginners?
A natural everyday look is usually easiest. Use lightweight complexion coverage, a little concealer, softly defined brows, mascara, blush, and lip balm or gloss.
8. How often should I clean my makeup brushes?
The American Academy of Dermatology recommends cleaning makeup brushes every 7 to 10 days. Makeup sponges should be cleaned after every use. Replace tools that become damaged or cannot be cleaned properly.
17. Final Thoughts
Learning makeup does not require expensive products, professional training, or complicated techniques. A few essential products, the right application order, and regular practice can help you develop a routine that suits your face, skin type, and personal style.
Begin with simple techniques such as blending foundation, applying mascara, adding blush, and choosing a comfortable lip colour. Once you understand these basics, experiment with eyeshadow, eyeliner, bronzer, and other products at your own pace.
Most importantly, remember that makeup should be enjoyable. You can wear a little, wear a lot, or choose not to wear it at all. Your personal preferences matter more than following every beauty trend.
“The best makeup look is the one that makes you feel comfortable, confident, and completely yourself.”
Keep practising, stay curious, and enjoy discovering your own approach to makeup.
My Final Thoughts on Makeup for Beginners
Learning makeup should be an enjoyable process of discovering what works for you, not a race to collect the latest beauty products or follow every trending technique. When starting out, it is easy to feel that you need a complete makeup kit, expensive brands, and dozens of brushes to achieve a polished look. In reality, understanding a few essential products and learning how to use them properly is far more valuable.
My recommendation is to begin with the basics. Learn how to prepare your skin, choose a suitable foundation shade, blend concealer, apply mascara, and add a little colour with blush or lipstick. These simple techniques provide a foundation for exploring more advanced makeup styles later. Once you understand how individual products work, choosing additional items becomes easier and more purposeful.
It is also worth remembering that makeup does not have to look the same on everyone. Some beginners may enjoy a natural everyday appearance, while others might prefer colourful eyeshadow, bold eyeliner, or statement lipstick. Both approaches are equally valid. Experiment with different shades, finishes, and techniques, but give yourself enough time to understand what feels comfortable and suits your personal preferences.
Another important point is to avoid purchasing products simply because they are popular on social media. A highly recommended foundation or eyeshadow palette may not necessarily match your skin type, complexion, budget, or lifestyle. Read product information, consider your actual needs, and build your collection gradually. Spending more does not automatically mean getting better results.
Finally, makeup should remain a personal choice rather than an expectation. It can be a creative hobby, part of an everyday routine, or something reserved for special occasions. You do not need makeup to look presentable, and you do not need to follow beauty standards to enjoy it.
The best starting point is a small collection, a little patience, good hygiene, and a willingness to practise. Focus on learning rather than perfection, and allow your makeup style to develop naturally over time.




















Leave a Comment
Your email address will not be published. Required fields are marked with *